Thursday, February 17, 2011

Here are some cards that we made for China

So my daughter was able to come home in February for a short visit and so we decided to make some Valentine cards for her basketball team players. It was a lot of fun doing this together and I’m anxious to hear how they liked them. We made only the face of the card using Make the Cut and my Gel pens and my Cricut…the dash lines were done on my Cricut using the pens…I think with more practice, it will be perfect next time. How I did this:  I took a rectangle and shrunk it small enough to make it  a thin dash and then did a wrap to object around a circle, then aligned the dash to the distance that I wanted it around the circle. I can’t wait for the next update for Make the Cut, because Andy is working on single stroke dashed lines which will be awesome to have for this type of use, I had a slight problem doing it the way I did it, because for some reason, in two spots around the circle the dashes are off, almost like they are doubled up, but when I checked it, they looked fine, so another way I could have done this, was to do Print and Cut, which would’ve worked also…but I wasn’t thinking Smile. Enjoy!

IMG_0228

100_6642

100_6643

100_6644100_6645100_6647100_6648

We made over 40 cards on that day…all very simple but nice cards using Make the Cut, Cricut, Gel pens, and printer!

Tuesday, February 15, 2011

All Girl/Boy Layout

Here is a layout I found on line, and I liked how it looked and how it made the eye look across the page towards the pictures. I thought it was really neat and so I tried to produce a similar page. I believe it was again Outonlimb website and she has some really neat layouts. So here is the page I made, I made one for the boys and one for the girls. Hope you like them.

IMG_0367

IMG_0368

Paper used: Scenic Routes…Mat sizes were 4 1/4 x6 1/4 black

4x6 pink. The rest of the cut files were done with my Cricut and Make the Cut.

100_6617

100_6622100_6623

100_6624100_6625

100_6626

100_6627100_6631100_6632100_6628100_6629100_6633100_6634100_6635

Tuesday, December 28, 2010

New Cricut Cartridges


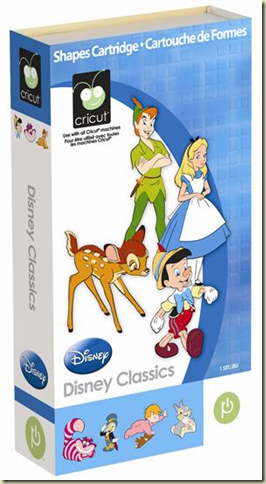
DISNEY CLASSICS

Relive the childhood magic of your favorite movies with the Disney Classics cartridge! This lovingly detailed cartridge features layered images and icons from four beloved Disney movies: Alice in Wonderland, Peter Pan, Pinocchio, and Bambi. You will love creating with Alice, the Queen of Hearts, Captain Hook, Jiminy Cricket, and other characters.
This cartridge includes: Layer 1, Layer 2, Layer 3, Icon, Icon Layer, and Shadow creative features.
image

image BBEST OF PIXAR

Take your creativity to new worlds with the Best of Pixar cartridge! This cheery cartridge includes layered images and icons from five favorite Pixar movies: Finding Nemo, A Bug’s Life, Monsters, Inc., The Incredibles, and WALL-E. You will love creating with Nemo, the Tank Gang, Boo, the Parr family, WALL-E, and EVE.
This cartridge includes: Layer 1, Layer 2, Layer 3, Icon, Icon Layer, and Shadow creative features.
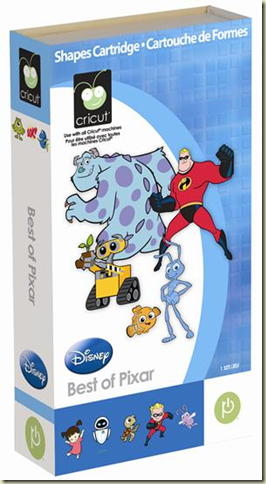
image image LIFE'S A PARTY

image image

Throw the perfect birthday, Halloween, or “just because” party with the Life’s a Party cartridge! This lively cartridge includes a variety of party-themed images, phrases, cupcake wrappers, and cards. Don’t forget about the layered 3D party favors and font with shadow included on the cartridge.
This cartridge includes: Layer, Phrase, Card, Cupcake Wrapper/Topper, Font, and Font Shadow creative features.

NATE'S ABCS

Celebrate the life of a little boy with the Nate's ABCs cartridge! This adorable shape cartridge is filled with layered boy-themed images and phrases. It also includes two fonts with numbers and punctuation so you can take your creativity even further.
This cartridge includes: Layer 1, Layer 2, Phrase, Font 1, Font 2, and Font 2 Shadow creative features.

image image

Here are the new Solutions cartridges:

MOTHER'S DAY BOUQUET

Layer your favorite shapes together to create hundreds of unique flower designs with the Mother’s Day Bouquet cartridge! You can use a pencil to curl the flower petals and leaves to get a 3D effect. Don’t forget to add buttons, glitter, gems, and other accessories (not included) to give your flowers a personal touch!

image

image

SPRING HOLIDAY CARDS

Create cards, envelopes, and boxes with the Spring Holiday Cards cartridge! This festive cartridge contains images for Valentine’s Day, St. Patrick’s Day, and Easter. Mix and match card fronts with backgrounds to create fun variations on your projects.

image

image APRIL SHOWERS

Celebrate the arrival of spring with the April Showers seasonal cartridge! This spring themed cartridge is filled with adorable images including birds, umbrellas, flowers, and phrases. Whether you’re looking for a cheery way to welcome spring or cute accents for your creative projects, you’ll love this cartridge!

image

image

Thursday, December 23, 2010

Pictures with Santa

Here is a very cute layout I found online and I incorporated some of my own touches…some chalking, some glitter and some bling!!! I hope you like it. I think the site was Michigan Scrapbooking. If you would like to make this site, you can let me know what names you would like me to use with my Make the Cut software using the new Print and Cut technique, I will add your children’s and or pets names to the Santa list, also I used Make the Cut program to do the Santa will be back at 1 stop sign! I love this program and I will be happy to help any of you learn how to use this wonderful software…It is awesome to use with our Cricuts or whatever die cutting machine that you may have. Make the Cut works on many of these die cutting machines. So here’s the layout:

IMG_5141

Not sure why but the colors are way off on this picture, the sleigh is fire engine red, and on the mats, the corners are a deep almost burgandy red. The trees are Christmas green and a shade lighter green in the middle. I added some glitter to the trees, the list on the sleigh include my children’s names and our pets!

Recipe: (4) 3 3/4 x 6 photo mats

The snow is a 2 1/2 x 12 inch strip that I put the pieces back to back and then cut my hills and valleys. The papers used are glitter papers that you can purchase at our local scrapbooking store SCRAPS!

IMG_5140

See how neat the stop sign, it was printed first and then using the Make the Cut sofware, I placed the paper on my mat, lining it up with the virtual mat that was on my screen, and presto, hit cut and you see it…perfectly cut stop sign with printing on it….did I say I love this program????

Tuesday, December 14, 2010

Make the Cut 3.20 update

Some of the improvements in the Make the Cut 

Faster cutting speed on the Cricut
New Cutter plug-ins
The option to rotate the virtual mat
Place objects on a path automatically
New Basic Shapes added
Tiler for cutting larger projects
SVG import with layers
Rhinestone count
Cut Inside shapes first
Duplicate multiple layers
and more!

So if you haven’t purchased Make the Cut , first click on this link or on the box for Make the Cut  on the sidebar, and then after you download it click on the link here to do your update. You will want to purchase it first and then do the update. I really like the new features, but one of my favorites that I have asked for when I first got the program last year, was to be able to have the option to design in Portrait mode so that I can cut from the top of my mat down…just like our printers, making it easier for my mind to set things up…I think you will like this new feature:

image

http://www.make-the-cut.com/setup/MTCInstall3.2.0.exe

Another option that is an update from 2.32 is the option to create lattice and rhinestones…this is such a neat feature in many ways…the rhinestones can also be used to create scallops and I like it for using my pen and then using skittles or viva pens to add a little glitz to my cards or layouts. So be sure to get your version of Make the Cut while it’s still on sale for $58.36, the price will be going back to $79 sometime in the near future, so this is a super savings, just thing the price of one cartridge!

Snow Fun Layout

Here is another layout that I again Scraplifted…sorry for doing this, but I have been really busy lately, and so it has been easier to try and get some simpler layouts done so I can get them into my albums…but I’m sure you will like them for their simplicity, they are still very nice. Enjoy!

100_6568

This paper I got at SCRAPS in Houlton, it is a soft blue with little white glittered polka dots…sorry forgot to get the name of the paper, but it looks like little snowballs falling…thought it was cute…I then used some Christmas silver ribbon for my mats. Again all pieces were cut with my Cricut using Make the Cut software, and I must say the snowflakes cut out so nice and smooth! I love that software.

Here is another option with the layout, I used a snowflake paper and again, oops I forgot to mention that my mats were stamped with the snowflacke roller stamp from Stampin Up.

100_6569

Saturday, December 11, 2010

Vinyl

Hey everyone…are you all done shopping yet? We are almost done, I just have to get my baby girls presents, and hubby’s and then finished…I am working on a few projects for the mom’s I babysit for, and some friends…maybe even you…so I can’t post them yet, but hopefully after Christmas, I can post some pictures of my homemade gifts.

Here is an idea that someone shared in the Make the Cut gallery and I loved her idea, and she even shared the file, so all I had to do was modify for my Christmas gift…my oldest girl is a teacher in China and her special treat to herself is a trip to the nearest Starbucks, so I thought, she’s always collecting their cups, but this is one she can’t buy from them :) Please leave me a comment and let me know how you like this. I used car vinyl on her cup and as long as she hand washes it, it should last for a very long time! Enjoy!

IMG_5050